Handpainted Silk Scarves: Page 1
- | Return |
- 1
- | 2 |
- 3 |
- Next |
- Home

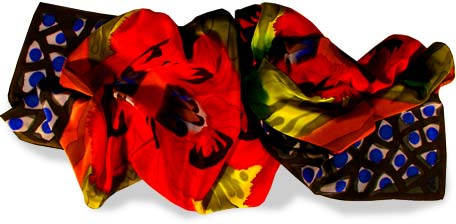
My Sensuous Silks
Soft And Colorful
Over time I have worked in many areas of visual creating. For the last one and a half decade I devoted my time to painting on silk, a medium full of pit falls and surprises. Silk painting results in a very feminine art, sensuous, but the process is anything but. To this day this medium challenges me most.
I work with French dyes on Chinese silks. My technique results in silks that are the same colors on both sides, not like printed silk where the wrong side is hardly worth mentioning. So when a lady wears a scarf of mine the direction it twists and lies on her shoulder does not matter, it is beautiful always. The protein dyes I use become part of the silk itself after the silk goes through a steaming process.
Since every silk cocoon is made by an individual silk worm, all threads are slightly different and take the dye in a different way. That is when you can detect what is called banding. It is also what gives the silk an ever changing luster.
The Process
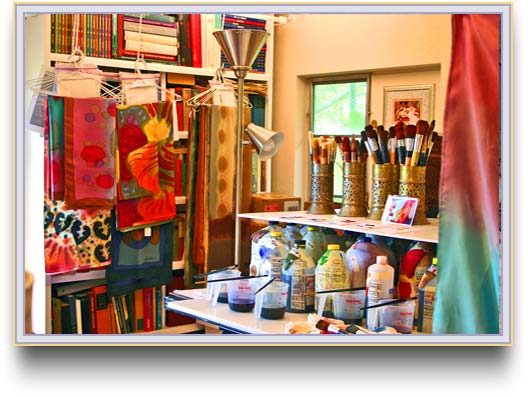
— Part of my studio —
The view into my studio shows you a wonderfully color rich environment. Just by the nature of the work it is so. This is where it all happens.
The first task in the process to paint the silks is to de-gum the white silk. A silk cocoon of the silk worm is held together by a sort of glue. This glue like substance stays in each thread that is unwound from the cocoon to weave the silk. These threads are very long when the moth has not escaped boring through the cocoon. If that happens, the cocoons are used to make raw silk, silk woven from short bits. Silk made from wild moth falls into this category.
The silk I work with is the long thread variety. There are many ways to create silk fabrics, I use only rather thin and flat silks for painting. The color is off white, never bright white unless the silk is bleached. I work on unbleached silk. Sometimes, where the ends of the threads have to be attached to each other, the silk has slubs in it. Slubs are visible double threads that look nubby. It is a natural thing for silk to have these, called flaws by a person who does not understand how silk is made.
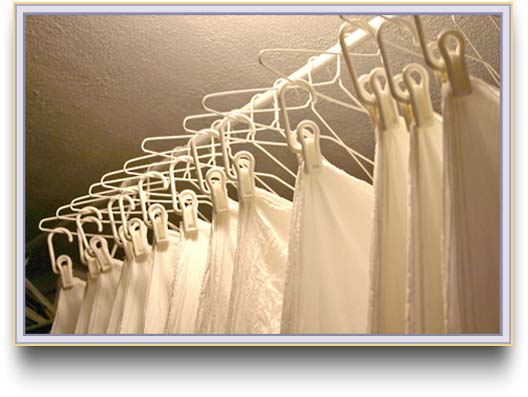
— Washed white silk on hangers —
So the fabric is full of gum spots after weaving. Those areas do not take dye well at all, sometimes they are almost waterproof. The silk is sold unwashed, so this gum has to be washed out before painting, hence all my silk hanging with clips under the ceiling. The silk has to dry and to be ironed and stretched before the painting can begin.
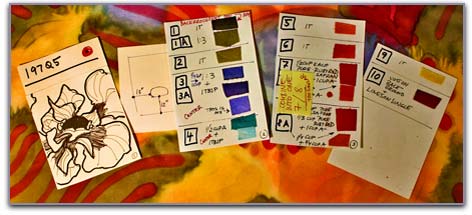
I Design The Images First
Before I start painting I design the images first and prepare the color combinations for a particular scarf. Often, while I do something else, an idea pops into my head and I make a quick sketch on an index card. That helps me to retain an idea. I find these cards all over the house, mostly tucked into a drawer or box or book.
The sketches are never too specific, the method of painting I use is not very precise, I do not use gutta, the line medium that most silk painters use to keep the dyes fenced in and force the image to be rather stiff. Iprefer the free flowing and loose style for My Handpainted Silk, the images are organic and soft, very feminine. My scarves are worn often by older ladies and harsh and precise designs around the face make them look older. By contrast, my designs of fluid colors without hard edges make a lady look softer and the face is caressed by gentleness. I often use toned down colors around the face, so the reflection on to the skin of the lady is softer.
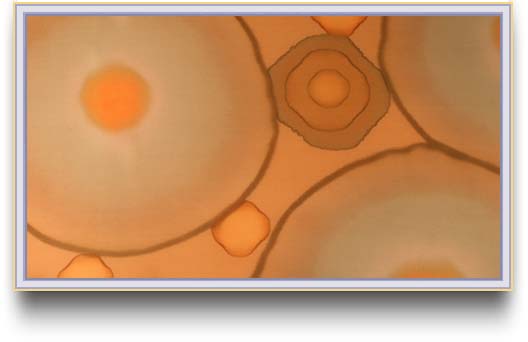
— Natural line building by silk dyes —
To make this silk painting a viable business, I can not paint just one scarf for each design. The preliminary work and the photo work after the scarf is finished in order to get it in front of the customer is too great for me to hold down prices for a one off piece. So I have to be able to repeat a design as closely as possible.
For that I prepare myself by mixing large amounts of dyes so repeats are indeed possible. Mixing dyes, and I mix all my colors—I never use the pre mixed versions—is a task that takes quite some time. The liquid dyes all look very dark and different from what they will look like on the silk later on. I know from experience what to mix and how to achieve a certain hue, but testing I always still must, especially when a batch of dye runs out.
I Manipulate The Flow
Since I use no line work with gutta, my technique utilizes the bleed outs of the dyes as lines, I manipulate the flow and create lines of other colors with the same dye. Over time I have learned to mix the colors so I have more control over those bleeds, but the overlapping of dyes in the process of bleeding results in surprises. Often they are charming, sometimes they are not so nice. When that happens I go back and remix the colors to get a better bleed.
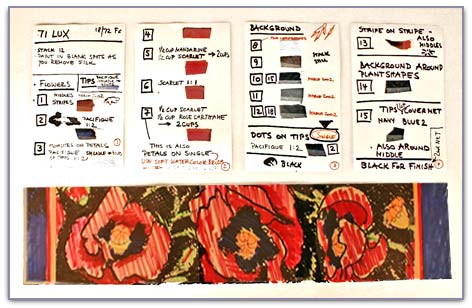
— Sketch and dye samples for poppy scarf —
— Finished poppy scarf —
I make notes when I paint the first scarf of a batch, the methods of painting I know and do not have to record, I know by looking at a design how it was done, but I have to record what is done at what stage. These silks are painted in many layers and that is the thing that can not be seen by just looking at it. The intermixing and mingeling process must be repeated exactly, otherwise the colors come out differently.
It is all very complex and at times frustrating to get the same result because the dyes are different, the silk is different, the airflow is different, the temperature is different, the humidity is different. All these things influence the outcome. Silk is like hair, a protein based material, acting very much like hair. Talk about bad hair days. What a fickle medium it is.
— Sketch and notes for single flower square scarf —
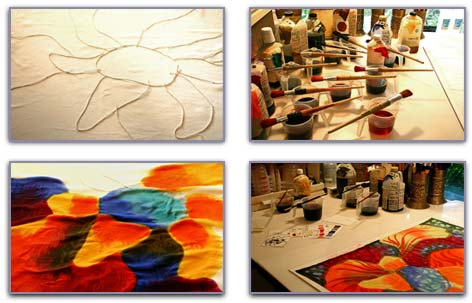
— The process of painting a scarf —
The above photos show some of the painting process. When I have shapes that need to be semi precise, I work with string to outline the rough locations. That helps me to keep the proportions right.
The painting itself is a drippy affair, the brushes can not be too loaded with dye, they would dribble and ruin the whole piece. My concentration painting these images must be at 100%. I can not interrupt in the middle of it either, the bleeds take over and things run together in a way I did not intend. Mostly I work with rather large and hard brushes, watercolor brushes are for most cases too soft.
To Work With Black Dyes Can Be A Nightmare
Since the dyes run so, a smallish brush produces a wide line when painted on the white silk. As soon as I have a background, the bleeding is contained. For that reason most of my scarves have backgrounds applied to first. The dyes are diluted with alcohol because the line building is smoother that way and the scarves dry faster. I have an exhaust system in my studio, for it would be dangerous to breathe these alcohol fumes for such long stretches of time.
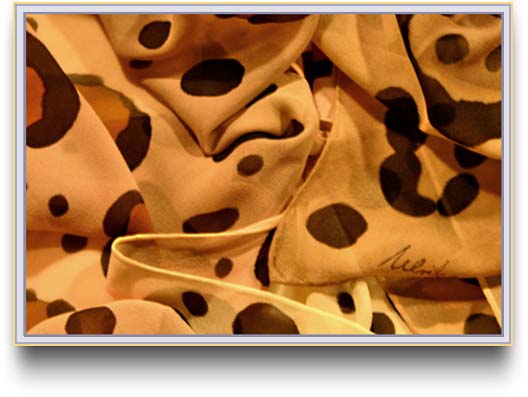
— A fantasy animal design —
To work with black dyes can be a nightmare. When I use black on white I lose two out of three painted scarves with smudges that happen in the final processing of the silks. The bleeding of lines continues also in the steaming.
Above is an example of an animal patterned scarf with much black on it. I love the effect of black very much and use it extensively, but it is very difficult to work with. The dyes run through the silk while they are applied, so I have sheets of slick plastic under the setup. When I am finished painting, interesting globs of dye bead on the sheets. I try not to get too much dye on my skin while working. Since they are protein dyes they color skin perfectly and for many days.
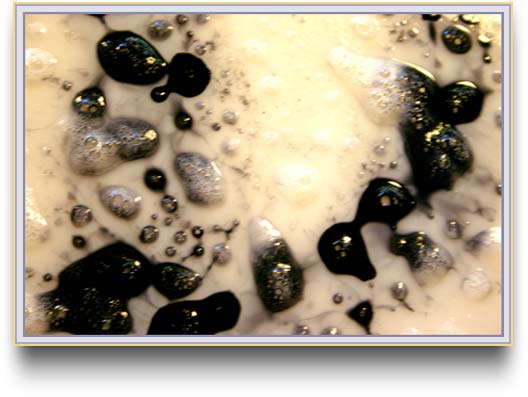
— Black dye run through —
Steaming The Silk
After the silk is painted it has to cure for a few days. Then I iron each piece, sign it and roll it up in paper and cloth, making sure that the silk is flat and smooth without any creases. The paper is there to absorb extra dyes. I roll this very tightly so the scarves can not slip, for this roll will be steamed in an upright position in a pipe like steamer, so I do not want the silk to slump down. The timing is different for different dyes. The scarves that have black on them I steam for eight hours, the scarves that are pale need only about two hours.
After the appropriate time I take out the roll and unroll it quickly so that any creases that might have happened can be washed out. Most of the scarves are washed on the same day, but the ones with black and white I let sit for some days to settle in more. I wash all scarves in the machine after washing them by hand first. The swirling in the machine makes sure that residual excess dye is gone by the time I iron them.
This is another wonderful side effect of this method: my Ulrike Silks can all be washed and when the removal of a spot is required, there will be no stains with rings on the edges, as so often is the case when silk garments are stained and one tries to get a spot out. My Handpainted Silk also have gone through the shrinking process before they are sold to people. The hand is incredibly soft and sensuous, just the way silk should be. The hand means the way it feels when touched, it is the term used in the industry. My scarves are a pleasure to wear — Ulrike
To see more of my hand painted silk scarves you might want to visit my other site. Click on the following link to go to Images and Things — imagesandthings.com

- Handpainted Silk Scarves: Page 1
- | Return |
- 1
- | 2 |
- 3 |
- Next
